You get the ISO from http://wiki.sangoma.com/NSC-Download and install it. On the initial install you will configure the basic stuff, hostname, ip/gw/dns and you will define the default root password.
Once it completes you will do everything else using the web portal.
The way you configure your SBC is up to you. I usually go with 2 IPs, one listening on the SIP trunk provider side and one listening on the Skype4b side but, it's possible to have a working SBC using a single IP as well but I find it more complicated to configure and to debug, if you have any problem.
So first thing was to add a second IP to the box in Configuration -> Network

So, I'm using two internal IPs, 10.201.32.75 as the SIP trunk provider side and 10.201.32.76 as the Skype4b side.
Next, you go to Configuration -> Media Profiles and you create a media profile for Skype4B, which should include PCMA (g711a) and PCMU (g711u).
There's other codecs available to choose so depending on what your SIP trunk provider supports and if you are willing to do transcoding on the SBC (processing power goes up!) you could add them to the list.

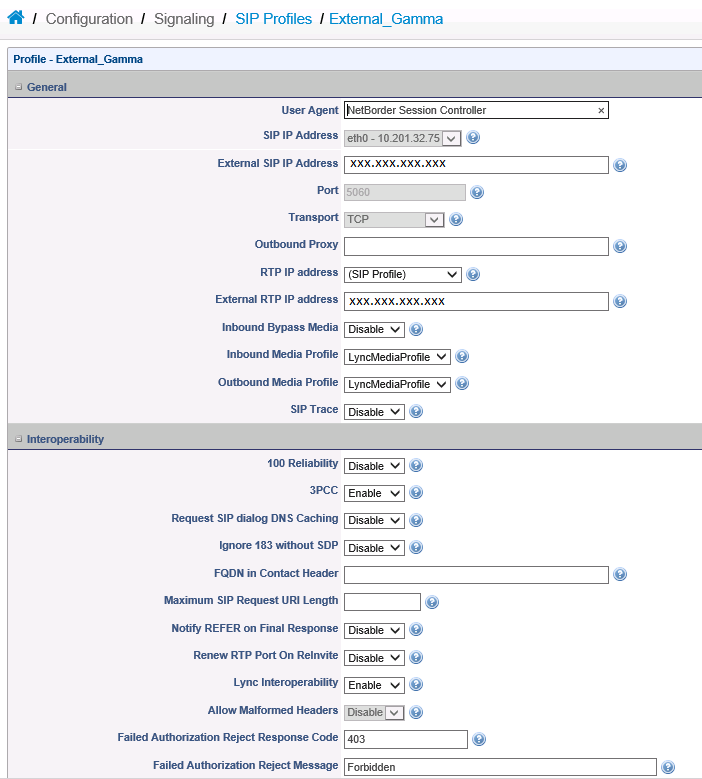
Next, you go to Configuration -> SIP Profiles and you create one profile for each side. In my case, .75 for the SIP Trunk provider (Gamma) and .76 for my lab pool (Skype4B).
For my external side, I choose my .75 IP, 5060 port and TCP, on the media profiles I choose the previous created profile with PCMU and PCMA.
Assuming you will also do NAT with the SBC, you will need to fill the External IP Address with the public IP. I've also enabled Lync interoperability on this side of the leg even though, quite honestly, I still don't know what it does :)
Everything else I left default. We'll come back to this page to add a routing plan, which we haven't created yet.
For my internal side, I choose my .76 IP, 5060 port and TCP, and selected the previous created media profile as well as enabling Lync interoperability.

Next you create your Trunks and you assign them to a SIP Profile. I created the Gamma Trunk with the Gamma SIP Profile and changed the transport to TCP.

Do the same for Skype4B but also fill OPTIONS 3 boxes as per below.

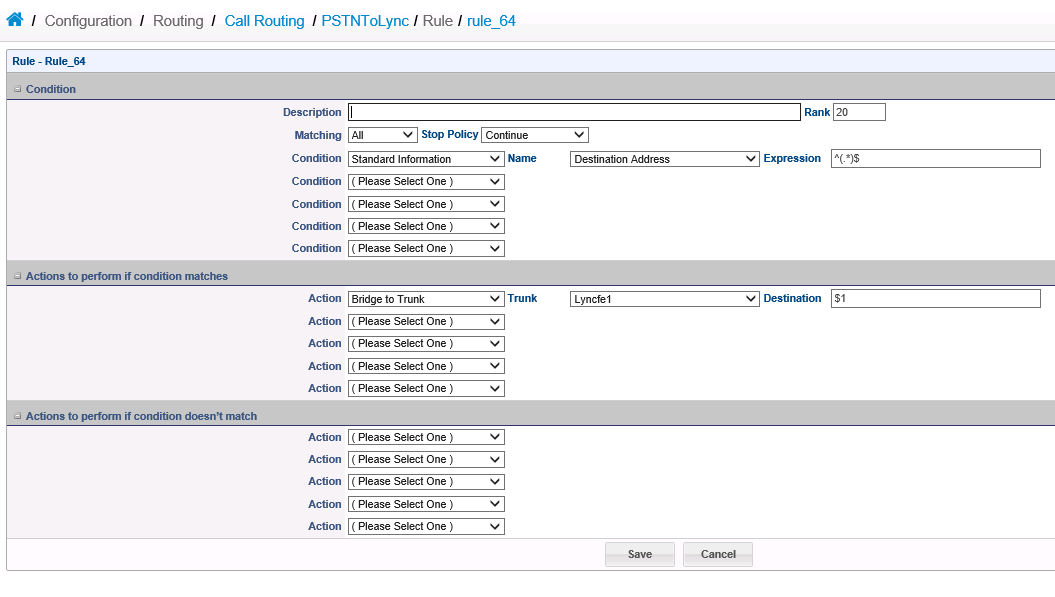
Go to Configuration -> Routing and add two routes, one for Skype4B to PSTN and one for PSTN to Skype4B.
I used Basic Call routing as I only want "pass-through" rules so the basic routing is fine for that. For Advanced routing you will be scripting the flow of the call yourself.
The basic routing is quite simple, it's a If Then clause. In this case, anything coming from Lync, just send to the Gamma Trunk.

And anything coming from Gamma, just send to the Skype4B Trunk.

And do the same for the internal side (Skype4B)

Once that's done you will need to click on Configuration on the top right and apply all of the configuration you have just done.
Some configuration changes will require just a reload, some will require a reboot.
Once that's done, go to the Dashboard -> Control Panel to start the Vega Session Controller (if you haven't already) and you are done.
No comments:
Post a Comment